House Painting Costs in Plano

When it comes to home maintenance, painting is one task that is best left to a professional. Painting contractors have the experience and the manpower to do the job properly and efficiently. They can also recommend the best type of paint for the project, taking climate and building material into consideration.

While you may be tempted to save money and turn this into a do-it-yourself project, your safety is important—professionals will have the special equipment needed to get up high and, more importantly, their own insurance, shielding you from liability. But there is a con: working with the wrong contractor. Be sure your contractor is insured, has a good reputation, and offers the best cost estimate to ensure you get the job done without any headaches.

There’s nothing like a fresh coat of paint to boost curb appeal and make an entire home feel fresh. But exactly how much does it cost to paint a house?

Average Cost to Paint a House

House-painting costs can vary significantly depending on your home’s square footage, where you live, and who is crunching the numbers.

But the pros at the trade organization Painting and Decorating Contractors of America (PDCA) can make a pretty good estimate. These are their ballpark figures for the average cost to paint a house, including labor and materials.

Cost to paint a house (both exterior and interior):

1-story 1,000 square feet: $2,500-$6,000

2-story 2,500 square feet: $6,750-$12,500

3-4-story 4,000 square feet: $10,000-$19,000

In addition to being affected by a home’s square footage, painting costs can vary based on the type of paint the chosen, the paint’s finish, the type of paint primer used, labor rates, and the type of exterior siding.

Free Estimates Call (972) 741-4995

Painting Contractor in Plano Texas Logo

How Much Paint Costs.

What type of paint materials you choose has a big impact on how much it’s going to cost to paint your home — not to mention how it looks and how long it lasts. To determine how much paint will cost, you first need to understand the different types, finishes, and quality of paint, and if you’ll need primer, too.

Paint Types

There are two types of paint: latex-based paint and oil-based paint.

Latex paint (also known as water-based paint) is the most common type of paint for home use, since it rolls on smoothly, dries quickly, is environmentally friendly, and tends to have less of an odor than oil-based paint. The main drawback of latex paint, though, is it’s less durable than oil-based paint.

Oil-based paint is commonly used for high-moisture areas, since these areas need more protection over time. Typically oil-based paints are superior to latex paints, take longer to dry, can create bad odor while drying, and contain more volatile organic compounds (VOCs), which essentially means they’re less environmentally friendly.

Here’s the cost breakdown for latex- and oil-based paints:

Latex-based paint: $20 to $70 per gallon

Oil-based paint: $30 to $70 per gallon

Paint Finishes

A paint’s finish can also affect its price tag. There are five main types of finishes: flat/matte, matte enamel, eggshell, satin, semi-gloss, and high-gloss. Each finish has its pros and cons, and their costs vary. Both latex-based paints and oil-based paints offer the full range of finishes.

Two aesthetic things to consider when selecting a finish are how shiny you’d like the surface to be and whether or not you want to hide any imperfections on the surface to be painted. Generally, higher-gloss paint finishes reflect light better than lower-gloss finishes, like eggshell and matte. That makes them shiny, and also causes them to highlight flaws.

  • High-gloss paint is the most durable and easiest to clean of all paint sheens. It’s ultra-shiny, light-reflective, and hard (think appliance-paint tough). It is a good choice for areas that sticky fingers touch, though, such as cabinets, trim, and doors.
  • Semi-gloss paint, which is slightly less durable than high-gloss paint, is well suited for rooms where moisture, drips, and grease are common and need to easily wipe away. This makes it appropriate for kitchen walls, bathrooms, and trim.
  • Satin paint has a lovely luster that, despite the name, is often described as velvety. Because it’s easy to clean, it’s suitable for high-traffic areas—including kitchens, bathrooms, trim, and chair rails—though it reveals application flaws, such as roller or brush strokes.
  • Eggshell paint falls between satin and flat on the sheen and durability scale. It’s essentially a flat, low-shine finish with little luster, like a chicken’s egg. Eggshell covers wall imperfections well and is a great finish for gathering spaces that don’t get a lot of bumps and scuffs.
  • Flat, or matte finish on the no-shine end of the finish spectrum. A friend to walls that have something to hide, flat or matte paint (the terms are interchangeable) soaks up — rather than reflects — light, has the most pigment, and provides the most coverage. It’s good for adults’ bedrooms and other interior rooms that won’t be roughed up by kids. That’s because it’s tough to clean without taking paint off.

Generally, the higher the shine, the higher the cost:

  • Flat/Matte: $20 to $50 per gallon, depending on brand
  • Eggshell: $1-$5 more per gallon than flat of same brand
  • Satin: $1-$5 more per gallon than eggshell of same brand
  • Semi-gloss: $1-$5 more per gallon than satin of same brand
  • High-gloss: $1-$5 more per gallon than semi-gloss of same brand

Paint Quality and Other Factors

Paint quality also affects paint price. Higher-grade paints tend to adhere to surfaces better and last longer. They also tend to be thicker. As a result, they cost more than lower-grade paints.

Major brands often offer a range of paint qualities—for example, Home Depot’s Behr sells Behr Premium Plus, Behr Premium Plus Ultra, and Behr Marquee (its higher-quality paint). An example of the cost difference between a gallon of semi-gloss Behr Premium Plus and Behr Marquee in the same color is $32 versus $46.

Another factor that can affect paint cost is color. For instance, trendy paints may cost substantially more than classic hues; a gallon of Sherwin-Williams’ popular Emerald Exterior Latex Paint is a whopping $83.99, compared to the brand’s more basic A-100 Exterior Acrylic Latex, which only costs $47.99 a gallon.

In addition, paint features such as mold and mildew resistance are important cost factors. Many mold-inhibiting bathroom paints, for instance, cost substantially more than ordinary latex-acrylic paint—sometimes close to twice the cost. Also, paints that come with warranties from the manufacturer may be more expensive depending on the length of the warranty. (A five-year warranty is standard.)

Paint Primer

Most paint jobs will require a layer of paint primer before paint is applied. Primer seals in stains, creates a more even finish, and ensures better adhesion of the paint to the surface. However, not all wall surfaces call for primer.

Applying primer over new or bare surfaces is a must, since it will seal the original material and prevent the paint from soaking into it. A layer of primer is also beneficial when painting walls with water damage, mildew stains, or greasy patches, since this will enable the paint to mask these surface stains.

If the walls are in decent shape, or the new paint color closely matches the old one, you can probably get away without using primer.

Some paints are two-in-one paint and primer products, or so-called “self-priming paints.” These paints are designed to seal and cover surfaces in one coat. But, here’s the secret: though it’s called a paint-and-primer-in-one product, there’s actually no primer in the mix—what you’re really working with is just a thicker paint that often doesn’t perform as well as using separate primer and paint.

The moral? Though two-in-paint can help you save time, it’s wise to opt for a separate primer in advance of most paint jobs.

There are three types of primers: oil-based, latex-based, and shellac-based. Their costs are as follows:

  • Oil-based primers: $20 to $80 per gallon. An industry standard for decades, oil-based primers are ideal for unfinished or bare wood. They seal the porous surface of wood, enabling the coat of paint to better adhere to the surface.
  • Latex-based primers: $20 to $80 per gallon. Ideal for preparing unfinished drywall and softwood (like pine) for painting, latex-based primers are less brittle than oil-based primers, which makes them less susceptible to peeling and cracking.
  • Shellac primers: $40 to $63 per gallon. Excellent at blocking stains, shellac primer works well on walls that are susceptible to water or smoke damage.

Though all three primers can be used under latex paint, it’s best to use a latex-based primer for a latex paint, oil-based primer for an oil-based paint, and shellac primer for walls with stubborn stains.

Interior Painting Contractor Plano, Texas.  House painter.

Average Cost to Paint Interior of a House

According to PDCA, interior painting costs will depend largely on the square footage of your home. Here are their estimated averages:

  • 1,000 square feet: $1,500-$3,000
  • 2,500 square feet: $3,750-$7,500
  • 4,000 square feet: $6,000-$12,000+

Average Cost to Paint the Exterior of a House

Exterior painting costs will vary depending on the size of your home:

  • 1-story 1,000 square feet: $1,000-$3,000
  • 2-story 2,500 square feet: $3,000-$5,000
  • 3-4-story 4,000 square feet: $4,000-$7,000+

Those figures don’t account for siding materials—and some sidings cost more to paint than others because of their texture and the type of paint required to properly cover them.

Here are painting estimates for the five most common types of siding, in order of least to most expensive:

  • Metal siding: $1,500 per 1,000 square feet
  • Concrete siding: $2,000 per 1,000 square feet
  • Vinyl siding: $2,000 per 1,000 square feet
  • Wood siding: $2,000 per 1,000 square feet
  • Stucco siding: $3,000 per 1,000 square feet

Labor Cost to Paint a House

While some professional painters will charge a flat fee for a painting project, most charge an hourly rate—about $25 to $100 per hour on average. Some painters will charge more for last-minute jobs (think 48 hours’ notice or less), travel costs (if you live far away, the painter may want extra money for travel time), or intensive prep work (e.g., removing mold or stains before painting). Depending on the painter, the rate may or may not include the cost of paint materials such as paint, primer, and supplies.

Repairs and improvements can also increase your painting budget. Painters may offer some of these additional services, but you may need to call in a specialist for others:

  • Drywall repair: $115 to $380 per room
  • Repairing plaster: $60 to $90 per hour or a fixed rate of $200 to $300 for minor to medium jobs.
  • Mold remediation: $500 to $6,000 based on the size of the area and level of mold infestation.
  • Patching holes: around $10 per square foot for resurfacing and repairing holes and cracks in the wall.
  • Sanding: around $1.80 per square foot.

Additional factors that can affect a painter’s labor costs are the number of stories and the condition of the home. Generally, the more stories a house has, the higher the labor costs will be. And, if a home is older, prep work such as scrubbing siding or sanding aging wood could be more time consuming for the painter.

How Much Paint Supplies Cost.

Though you can save potentially save big bucks by not paying for someone else’s labor, there are trade-offs to doing the work yourself. For one thing, you’ll have to buy supplies such as drop cloths, tape, ladders, brushes, and rollers.

Drop Cloths

There are different types of drop cloths you can use to protect furniture and floors while painting. Here are the types and price estimates:

  • Canvas drop cloths: $15 to $20 for 9×12-feet. Canvas cloths are the most expensive, but they are virtually indestructible—buy them once, and they’ll last for many years.
  • Plastic drop cloths: $1 for 9×12-feet. Paint-proof, lightweight, and economical, plastic drop cloths are good for protecting furniture and cabinet covers. They can also be used to protect lawns and landscaping during painting.
  • Paper drop cloths: $3 to $5 for 9×12-feet. Paper drop cloths provide a cheap way to cover furniture or windows while painting small, indoor jobs, such as touching up window trim. They’re absorbent and textured to hold paint. When you’re finished, you can just fold them up and throw them away. However, paper cloths are not the best option for protecting floors since they can tear easily.
  • Paper/poly drop cloths: $2 to $6 for 9×12-feet. The best of both paper and plastic, these cloths are low-cost and disposable. They absorb paint drips while providing more protection for what’s underneath. They also provide some protection from slipping. Plus, you can cut paper/poly drop cloths to fit the space. But, like paper, paper/poly drop cloths can rip more easily than plastic or canvas drop cloths.
  • Upcycled drop cloths: Have old shower curtains, drapes, or other sturdy material lying around? Both your wallet and the planet will thank you for hanging on to them for painting projects.

Painter’s Tape

Painter’s tape—a must for protecting areas that should not be painted, like crown molding—costs about $7 to $10 for a roll of 60 yards. Delicate surfaces, such as wallpaper or ceiling tiles, will require a lower adhesion tape than ordinary walls and trim.

Ladders and Scaffolding

Ladder prices vary based on size — though most homeowners can paint the interior of their home using a 16-foot extension ladder, which generally costs between $100 and $200. Folks in houses with low ceilings may even be able to get away with a step stool, the prices for which vary widely, from $30 to $100, depending on height and durability.

The right ladder to fit your exterior painting needs will vary by the size of your home, but generally, the job will require an extension ladder, which can run between $200 and $300.

Brushes and Rollers

Of course, paint brushes and rollers are also important line items on your budget sheet. A 3-inch-wide paint brush costs, on average, $10 to $20—though you’ll likely need an assortment of paint brush sizes for trim, corners, and narrow surface areas. Brushes come in a variety of bristle types and qualities, and each has a different purpose. Some are intended for specific paint types, finishes, and surfaces, so be sure to buy the right brushes for your painting job.

You’ll also need a set of paint rollers. Paint roller kits that include paint trays cost about $10 to $20. Like brushes, rollers are sold with different textures to suit different surface types, such as smooth or rough.

Having a professional paint your home from top to bottom, inside and outside has a number of advantages. For one thing, it’ll save you a ton of time by not having to do the work yourself. In addition, you won’t have to be concerned about safety issues, such as climbing a ladder to paint your house’s gutters. Best of all, you can expect a clean, attractive finished product from a professional painter.

Find a Competitive, Skilled Painter

Of course, the painter you choose to hire will be handling the lion’s share of the workload. Take these steps to find a reliable painter — someone you can trust to do a great job for a fair price:

Get quotes from at least three painters. Just like any other contractor, you’ll want to obtain several bids before deciding who gets your business. Have the painters come to view your property in person before they write you a formal bid. This way there will be no surprises when the painters show up to perform the work.

Compare offers. The painter offering the lowest rate may not always be the best painter for the job. Indeed, the total cost isn’t the only factor to consider when choosing between multiple bids. You’ll want to look at contracts side by side to ensure you’re making an apples-to-apples comparison. Are the same materials being used? Are the same services included? Does the painter provide a warranty?

Ask the right questions. Before signing a contract, make sure to ask a painter these questions: How long has your company been in business? Do you use subcontractors? Do you have proof of business liability insurance and workmen’s compensation insurance? How much wall prep is included in the estimate? How do you communicate with your clients?

Interview past clients. Talking to former customers is always a good idea. But, to ensure you’re getting honest feedback — not just feedback from people who have been handpicked by the painter to sing their praises — ask to speak to the painter’s three most recent clients. When you speak to them, ask about specifics. Find out whether the painters showed up on time, protected furniture from paint spills, kept the house clean, and completed the project on schedule.

Oftentimes you can get a discount for doing multiple jobs all at once. So if you’re thinking about painting your entire house, inside and out, there could be a benefit to doing it at the same time.

We hope this article was helpful.

Ron Bledsoe, Owner, Paint Ovations

Call (972) 741-4995 for your FREE estimate.

Popcorn Ceiling Removal

Call today!  972-741-4995

Popcorn Ceiling Removal Services

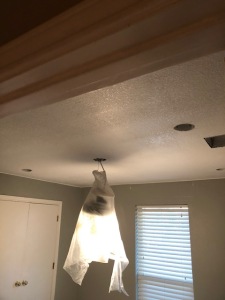
Popcorn ceiling was a popular choice for home decoration for many years, offering homeowners a solution that hides imperfections without sacrificing quality acoustics. But now, a popcorn ceiling can make a room look date, and removing it has become a concern for many looking to update their homes.

This is particularly the case for homeowners trying to sell their homes in an increasingly competitive market, as well as those who have just purchased a fixer-upper and are looking to make it their own.

A popcorn ceiling can be difficult to clean and maintain. The texture easily accumulates dust and cobwebs, which is problematic in homes with high ceilings that are difficult to reach.

This is why many homeowners opt for popcorn ceiling removal services in order to achieve a cleaner, more modern finish for their home ceilings.

Paint Ovations, offers this service with all of the experience and attention to detail our customers have come to expect.

Popcorn and textured Ceiling Removal Services in Plano, Texas.

Popcorn Ceiling Removal Process

The complexity of the job makes it a difficult task to undertake without professional help, which is where Paint Ovations comes in. Our team have extensive experience in this kind of project and can deliver perfect results quickly and efficiently. This could even include painting the ceiling a new color.

  • Cover Walls & Floor:  Covering the walls and flooring with heavy duty plastic sheets.
  • Prep Ceiling:  Spraying the surface with small amounts of water so that the popcorn ceiling easily scrapes away.
  • Removal: We us special tools in order to assure we keep the mess to minimum.
  • Skim Coat: Skim coating any damaged areas prior to sanding to ensure a smooth, properly prepared surface for painting.
  • Paint Ceiling: Application of a fresh coat of paint primer followed by the paint color of your choice.

Why Hire a Contractor to Remove My Popcorn Ceiling?

Popcorn ceiling removal is an involved and messy process, requiring special tools for scraping, sanding, and vacuuming the dust that accumulates on the ground.

It can be time-consuming, depending on the height and square footage of the ceiling, as well as on how intricate the popcorn pattern is.

If popcorn ceiling removal services are required in a furnished room, all the furnishings will have to be removed or protected, making the process even more labor intensive.

Save yourself time, money and unwanted headaches and have Paint Ovations perform the work in removing your textured ceiling.

Call today!  972-741-4995

House Painting in Plano Texas

Call 972-741-4995 for a FREE estimate.

House Painting

The interior of your home is your special place.  It is where you live, rest, eat and entertain.  Your foyer is the entryway into your home.  Your doors, trim and cabinets get used daily. 

Shouldn’t you protect and enjoy your home?

With the help of Paint Ovations, painting services, the interior of your home can set the mood and look you want for each room.  All while using paints that are durable and long lasting.

Interior House Painting Items:

  • Walls and Ceilings:  When your think of changing the color, look and feel of a room, your walls and ceilings are the first thing that comes to mind.  With years of house painting experience, we can help you choose the right color and quality paint. 
  • Doors and Interior Trim: Nothing makes a fresh wall color pop like a good coat of trim and door paint.  The doors and trim, frame out the walls and ceilings.  The use of durable paints is important since the doors get used daily and the baseboard trim gets hit and scuffed often.  Door frames and trim get the most abuse.  Slamming doors, hand prints and nicks from traveling through the doorways requires the most durable of paints.  Paint Ovations, only uses the highest quality paints from Sherwin-Williams and Benjamin Moore to fit your home painting budget.

Exterior Painting

Painting your house is one of the best things you can do to boost its curb appeal, increase its resale value, protect in from the weather and help you love your house even more than you already do. But this gratifying project can become grueling if you go about it the wrong way. Taking an informed, measured approach to painting will create a stunning house that’s the star of the block, while protect your investment.

The exterior house painting services at Paint Ovations saves your time (who wants to paint on the weekends), protects your home (by using the best paints for your exterior) and makes your life safer (working on ladders is risky). 

The added benefits of having Paint Ovations, paint the exterior of your home.

  • Inspect Your Home’s Siding and Trim
  • Fix Major Problems.  Replace broken siding, fix split or decayed window trim
  • Remove Loose Paint
  • Caulk and Patch Cracks and Crevices.  Not only does this save you energy, but keeps out unwanted pests. 

House exteriors need protection. Battered by snow, rain, wind, sun, and falling objects, house exteriors are subject to damage on a constant basis. Providing protection for your home’s siding also means protecting everything inside of your home. When the home’s envelope fails, the rest of the house follows suit rapidly.

We Paint

Get your FREE ESTIMATE today!

Kitchen Cabinet painting by Paint Ovations in Plano Texas
White Cabinets in Plano Texas

Kitchen Cabinet Refinishing and Painting

Kitchen remodels are not only popular, but they can add serious value to your home. However, they’re also often an expensive investment themselves. Fortunately, you don’t have to spend a significant amount of time or money to get a fresh new look. Simply refinishing or painting your kitchen cabinets is often enough to have a huge impact on your kitchen’s appearance.

Kitchen cabinets have a lot of requirements to meet. They need to be sturdy and large enough to hold dishes, utensils, pots and pans, and other kitchen supplies. They need to be able to withstand sauce splatters, water spills, dings, and scratches from heavy kitchen traffic, and hands dirty from cooking messes. And they need to be beautiful.

Easy enough, right?

Finding kitchen cabinets that fulfill all these requirements and are relatively affordable—a 2017 study found that most people budget and spend between $25,001 and $50,000 on their kitchen renovations—can be daunting, doubly so when you consider how quickly kitchen design styles shift.

If your cabinets are like anything below, refinishing and repainting them maybe right for you and your budget.

Your Cabinets Are in Good Shape: Do your cabinets simply need to be cleaned or scrubbed to get rid of a dull look? Cabinet refinishing is a good solution. It’s not as involved as refacing, but it will make your cabinets look new again. If you want to change the color, cabinet painting is your answer. 

You Don’t Want to Replace Your Cabinets: If you like your cabinets but wish they didn’t look so worn down, hiring a professional to refinish them will save you the time and money of a full kitchen remodel.

You Can’t Afford Extensive Remodeling: If your kitchen looks a little drab but your bank account can’t handle the stress of remodeling, refinishing or painting cabinets is a good compromise. It will restore shine and life to your cabinets without going over your budget.

Your Cabinets Need an Update: Cabinets will show wear and tear after lots of use and years. After all, wood can only take so much opening and closing, messy hands, and grease splatters before it shows its age.

Your Cabinets Feel Unclean: Remember those messy hands and grease splatters mentioned above? They’ll take a toll on your cabinets over time, leaving them feeling gross to the touch and unclean. If your cabinets constantly feel dirty no matter how hard you scrub, refinishing or cabinet painting can help.

Refinishing delivers a deep-cleaning makeover to kitchen cabinets in need of a fresh look. If you need help with your project, call the licensed and insured contractors at Paint Ovations of Plano, Texas.

Contact Us today to schedule your FREE Estimate.

Drywall Repair in Plano Texas.  Popcorn ceiling removal.
Drywall Repairs

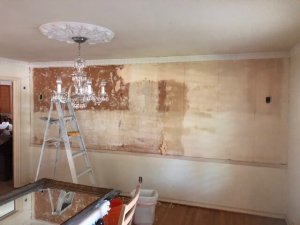
Wallpaper and Textured Walls/Ceiling Removal

Many homeowners dislike the look of wallpaper or textured ceilings.

For some people, wallpaper’s durability can be a problem. Designs and patterns chosen decades ago simply don’t work with a more modern decor. Homeowners who like to change the look of their home from time to time typically prefer paint, which is cheaper and easier to apply and can be changed up in a fraction of the time that wallpaper changes would take.

If you’ve had enough of your old, outdated wallpaper or popcorn/textured ceilings, it can be tempting just to paint right over it.

We’ve all heard horror stories about wallpaper removal, everything from drywall that crumbled as the paper was removed to homeowners who peeled away dozens of layers of paper only to find more underneath.

According to most home improvement experts, as well as the National Guild of Professional Paperhangers, wallpaper should be removed before painting, as you’ll experience better results and fewer problems down the road.

Benefits of having Paint Ovations removing your wallpaper or removing textured ceilings.

Find out if anything is wrong behind that paper or texture.  You could have water stains, that you can’t see or other issues.

You get a more durable, long lasting paint job, compared to painting over the wall paper or texture.

Saving you time and money in the long run.  Removing texture or wallpaper the wrong way, could cost you more money with repair and take longer to get your room back up to normal conditions.

Contact us today to get your FREE ESTIMATE.

Deck wash and stain

Decks add value and living comforts to your home.  To get the most value, you should get your deck washed and sealed often. 

With the cost of a new deck costing $8,000 and up on average.  Maintaining your decks usefulness, longevity, and appearance it is wise to have your deck washed and sealed if it has been a few years since it was last done.  If your deck has never been washed properly and sealed, you maybe looking at expensive repaired or replacement costs in the near future. 

Common Questions and Answers about Deck Washing and Staining

What is the average lifespan of a wood deck?

 The life expectancy of a wood deck is 10 to 15 years, perhaps up to 20 years, with maintenance and coating with a weatherproofing sealer every few years.

Should you power wash deck before staining?

Pressure washing can help, but if you want your stain to last, using a good deck cleaner and brightener on the deck prior to pressure washing will provide you the best result. A good deck cleaner can remove the gray fibers, dirt, mold, mildew and other impurities deep in the wood.

When Can I stain my deck after pressure washing?

Average Drying Time

As a general rule, 48 hours is sufficient drying time for a newly washed deck. But this also assumes optimal drying conditions, such as a sun-facing deck. If you are on the shadow side of the home where little to no sunlight reaches, wait at least 72 hours before applying any stain or sealer.

Is it better to seal or stain a deck?

Many deck companies recommend using a combination stain/sealer product, which is basically a sealer with pigment added. The advantage of this, they say, is the sealer provides additional protection against water and weather damage, while the stain helps reduce fading from UV rays.

How often should a deck be stained and sealed?

Applying a sealer and/or stain typically is recommended every two to five years, depending on the finishing product, deck use, weather conditions, and sun exposure.

Contact Paint Ovations for a FREE ESTIMATE and get more life out of your deck.

Pressure Washing

To enhance the beauty of your home and protect the value of your investment it is essential to maintain the exterior surfaces by cleaning them at regular intervals. Depending upon your location, we recommend pressure washing your home once per year to eliminate salts, dirt, mold and mildew.

RESIDENTIAL

  • Home exterior pressure washing
  • Driveway cleaning
  • Sidewalk power washing
  • Poolside
  • Patio furniture
  • Fences
  • Decks
  • Waterproofing

COMMERCIAL

Pressure washing your business will leave a lasting impression on your customers. Combined with window cleaning services, your store or office will stand out like never before!

  • Office buildings
  • Gas stations
  • Convenience stores
  • Parking lots
  • Drive throughs
  • Storefronts
  • Walkways
  • Common areas
  • Dumpster / trash areas

Fall Deck and Fence Staining in Plano, Texas

FREE Estimates Call 972-741-4995

If you have never stained your wood deck or fence, now is the time of year to have it protected from the winter elements. 

Keeping the deck clear of leaves and debris and giving it a routine cleaning will help keep moisture from becoming trapped in areas and keep the deck in overall good health. 

For a wood fence, think of how the wet fall leaves can rot out the bottom of your fence.  In a couple of years of not being protected, your four-legged friends can escape. 

It’s a good idea once or twice a season, or every other month, to get some dish soap and wet the deck down and clean it with a straw brush or broom.

Pressure washing is an effective way to deep clean a deck, but it’s also an easy way to ruin it. Homeowners not experienced with pressure washing should leave that job to the professionals.

“A lot of times, they’ll scar the wood because the tip is too close or they’re using too much pressure,” Ron Bledsoe with Paint Ovations says. “They’ll fur the wood up, or scar it.”

Ron recommends staining and sealing a deck every three to four years. Before staining, his company thoroughly cleans the deck, inspects the wood and fasteners for any safety issues and applies a conditioner for better stain penetration. It’s important the wood also be dry, or the stain can peel easily. Ron’s company uses a moisture meter and looks for a moisture content of around 15 percent.

Homeowners thinking of staining a deck themselves should consider the investment of the materials, equipment and time it takes to do the job well.

“The mistake people make is they get a bid from a professional and they compare that to the price of the stain,” Ron says. “Well, there’s much more that goes into it than that. There’s the proper equipment; the knowledge; the expertise that they have. It’s a big job to do it right and the professionals know how to do it. They do it every single day. They know how to (protect) your yard; know what products to use and how to install them. And, if there’s a problem, they are accountable for the repairs; not you.”

Deck and Fence Staining Materials

  • Deck cleaner
  • Garden hose or power washer
  • Orbital sander
  • Broom
  • Tarps
  • Stain
  • Paint brush
  • Rags

Deck and Fence Staining Process

  1. Check the weather reports. Wait for a three-day stretch of time without rain and with low humidity. For best results, pick a day when the skies will be overcast (direct sunlight can cause problems as the stain dries). Temperatures outside will ideally be about 60 degrees Fahrenheit. Tip: If you wish to do this project at a time when it’s very hot or cold outside, check the container of stain before getting started to ensure that outdoor temperatures are acceptable.
  2. Clean the deck with deck cleaner, following the instructions on the container for best results. Do this the day before you get started and make sure the deck is fully dry when you start to stain.
  3. Make any necessary repairs. Use wood filler to fill scratches or gouges that may have developed in the wood. Rotten boards that feel soft need to be replaced with treated lumber. For a tutorial on how to replace rotten boards on a deck, take a look at this video: https://www.youtube.com/watch?v=pQG6Lg47-Xk
  4. Lightly sand the deck with an orbital sander, then sweep away the sanding dust.
  5. Cover the bushes and landscaping in the area around the deck with tarps.
  6. Apply the deck stain with a paint brush. This may sound low-tech, but using a paint sprayer can result in wasted stain and an uneven finish. Tip: Wipe up puddles with rags as you go. Don’t allow the stain to pool in any one spot on the deck.
  7. Apply a second or third coat as needed until the stain is uniform and even. Most stains are a one coat application.  Tip: Don’t let the stain dry between coats. Stain is designed to repel liquid, so once the stain has dried, the wood will no longer absorb the second and third coats of stain.

Check out the available deck stain colors.

This project should be done every couple of years or when the stain starts to wear away in high-traffic areas, whichever comes first.

Staining your deck in the fall will help you to stay on a regular schedule so you do not neglect your deck. A lot of people also like getting a good coat of stain prior to winter weather, which can be harsh on a deck. Enjoying your deck and other things in life all season and planning to stain your deck in the fall can be the ticket to regular deck maintenance.

Call 972-741-4995 Paint Ovations today to have your deck or fence professionally protected. 

Here are some of the more popular answers to the most common deck and fence staining questions:

  1. No deck stain will last 5+ years. A good quality stain will last 2 or maybe 3 years on a deck floor (horizontal) and typically twice as long on railings, siding, etc. (verticals).
  2. Penetrating stains will have less chance of peeling as they soak into the wood grain and do not film on top of the wood grain when fully cured.
  3. Penetrating deck stains are easier to maintain by cleaning and reapplying after 2-3 years.
  4. Filming Deck Stains that dry on top of the wood can be harder to remove and/or reapply as they are more prone to peeling, wear, flaking, etc.
  5. Not all Deck Stains are penetrating. Even when they claim otherwise.
  6. Semi-transparent, Transparent, and Semi-Solids will show the grain of the wood to some extent. Solid stains, Deck Resurface Coatings, and Paints will not.
  7. Clear sealers without any pigment/color will not prevent UV graying. Lighter Pigmented stains that are Transparent, Semi-Transparent, or Semi-solid will have less UV protection than Darker Pigmented stains in the same transparency. More color/tint = better UV protection.
  8. Deck Stains are either Oil-Based or Water-Based. Filming or penetrating. Transparent, Semi-Transparent, Semi-Solid, Solid (opaque) Stains or a Deck Resurface Coating. See here for more info on Deck Stain Types.
  9. Oil-based stains can still be used in all States and Canada as long as they are compliant to local VOC regulations.
  10. When switching brands of deck stain, it is always best to remove the old coating first. Do this by using a Deck Stain Stripper and/or sanding.
  11. Always apply a Wood Brightener after prepping with a Stain Stripper or Wood Deck Cleaner to neutralize the caustic.
  12. New Decks (less than a year) are treated differently than older decks (more than 1 year). New decks need to be prepped and usually cannot be stained right away. See this about Staining New Decks.
  13. Prep, Prep, Prep = increased longevity of a stain.

Call 972-741-4995 Paint Ovations today for a FREE deck or fence staining estimate. 

Cabinet Refinishing in Dallas

Kate disliked the cabinets in her kitchen from the moment she moved into her Dallas home. “They were oak faced and worn,” Kate says, “but my husband’s motto was ‘If it ain’t broke don’t fix it.'” After many years of say how she hated the cabinets, Kate decided it was time to act. “I couldn’t stand it anymore,” she says. But rather than spend the $25,000 or $30,000 redoing the kitchen with new cabinets which would have cost her, she settled on a simpler, cheaper and far less intrusive solution.

Motivated by a social media ad for Paint Ovations kitchen-cabinet-refinishing service, she scheduled an appointment and signed up. After two visits to take make sure of color selections and show her the new finish and hardware options she could choose from.  Ron and his team of professional painters moved in. Three days and 29 cabinets later, Kate’s kitchen was transformed. “I’m 100 percent satisfied,” she says.

Total cost: $4,100.

Kate is fairly typical of thousands of U.S. homeowners who make the decision each year to refinish rather than replace their cabinets. “The truth is,” says Gerry Baldner, founder and president of Kitchen Solvers, a kitchen franchising firm in La Crosse, Wisconsin, “some of the cabinets built 20 and 30 years ago are more solidly constructed than most modular, prebuilt cabinets today. So, when it’s time to redo the kitchen, it often doesn’t make sense to start from scratch.”

Basic Cabinet Refinishing Process

The basic refinishing project consists of removing cabinet door and drawer fronts. Then sanding, priming and painting the frames and sometimes the inside of the cabinet boxes.  Most jobs take two to four days, depending on kitchen size and extras like hardware. The work itself is a standardized progression of tasks, generally handled by one or two painters.  

The cost to refinish cabinets depends on the materials and amount of cabinets or surface area. It is very important to prepare and use the right materials for the job.  Putting latex paint over a wood finished cabinet is a big NO-NO. 

With whites, greys and even olive colored cabinets being the new trending colors, it really doesn’t make much sense to replace your cabinets.  A simple starter set of cabinets for a 10 x 10 kitchen at Home Depot starts around $3,000.  That doesn’t include removing the old cabinets and installing the new ones, which would cost an addition $5,000 or more in labor. 

If you are wanting to change the look of your kitchen, and the cabinets are in good shape, refinishing them in the color you want is the way to go.  Not only in cost savings, but also in time and headaches. 

New knobs, hinges and drawer slides are an additional cost, but now is the time to do it.  With the drawers pulled for finishing, the drawer slides are easily replaced.  And since the hinges and knobs have to be removed, now is the time to replace them as well. 

You may want a two-post handle where a single post knob was.  If that is the case, the hole will be filled, sanded flush and finished along with the remaining cabinet parts.  It is important to think of the handles and knobs before the finishing process.  As any changes after they are finished would be an extra charge, as the entire finish process would have to be redone, for one hole or two to be filled. 

Cabinet Refinishing in Dallas Texas
Nice bright white cabinets make a dark kitchen more inviting.

What Refinishing Costs

The cost to refinish cabinets depends on the size of your kitchen, the materials you choose, and how many options you elect to include. “Our typical refinishing job runs $2,000 to $4,000,” says Ron with Paint Ovations.

The bottom line is that it comes down to personal taste. You can take the same kitchen and do the plain-Jane refinishing for $2,500 or, for $6,000 or $8,000, doing countertops, a new sink and some bells and whistles.  You can expect to invest about $2,000-4,000 in the refinishing part of the remodel. 

Replacing and Refacing Cabinet Cautions

Caution to customers who have been told at home centers and other retailers that they can have new cabinets installed for about the same price to a little more, calculate carefully. There are a lot of costs added on that most people don’t think about when considering kitchen remodeling.  

If you get a quote on new cabinets, or a cabinet refacing make sure it includes handles, molding, installation, sales tax, delivery charges, refinishing your walls if the new cabinets don’t line up with the old, any required plumbing or electrical work.

Plus, there’s the prolonged disruption and mess that come with a full-scale remodeling job. Refinishing your cabinets is a convenience as much as it is a cost savings.

Refacing companies are listed in the yellow pages or online, most often under “Kitchen Cabinets Refinishing/Refacing”.  But be aware; the quality of work varies widely, and bad refacing work looks bad.

Dealing with Lead Paint

If your kitchen cabinets were painted before 1978, the paint most likely has lead in it, and refinishing contractors are required to take special precautions when working. They’re also required by federal law to provide homeowners with the “Protect Your Family from Lead in the Home” brochure.

The key is to keep surfaces moist to keep the dust down, seal the kitchen with plastic and have workers wear respirators. Also cleaning up with HEPA vacuums, which don’t exhaust lead dust.  The doors and drawers are normally taken offsite to be finished, so there is no chance of lead dust.

Planning on refinishing your kitchen cabinets?

The next step is to contact Ron at Paint Ovations for a FREE in-home estimate.  Ron will come out, take a look at your cabinets to see if they can be refinished.  He will listen to your wants and needs out of the project, plus your schedule.  From there the next choice is colors and hardware choices. 

Once these are picked out, a day to start is agreed upon and the work begins.  Many times, you can still use the kitchen during the refinishing process, unlike a full remodel.  The entire process from estimate to finish could be as fast as 7 days or a few weeks based on both parties, schedules. 

If you are looking to add value, save money and feel more at home in your kitchen, give Paint Ovations a call.